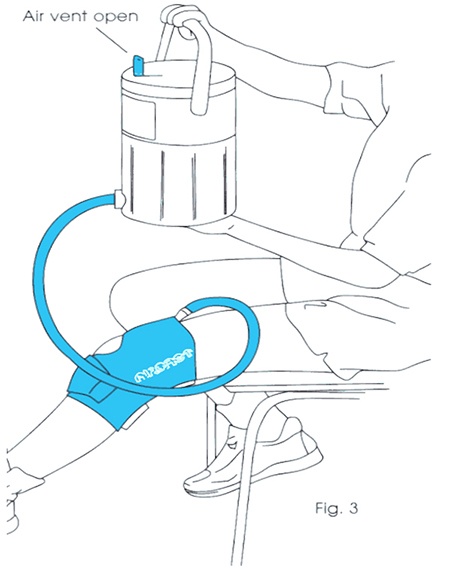
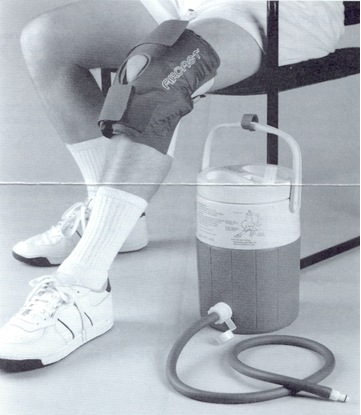
The cryocuff is a knee sleeve which can be inflated with ice cold water. It reduces pain, swelling and bleeding into the knee joint.
It consists of three parts:
- Cuff – covers the knee with pressurized water
- Cooler – holds enough ice and water for 6 – 8 hours of therapy
- Tube – exchanges water between the cooler and cuff.
Operation :
The cooler is filled with water and ice and the cuff is placed on the knee. Elevating the cooler forces cold water into the cuff and compresses the knee. The higher the cooler is elevated above the knee the more water will flow in to the cuff.
Body heat will warm the cuff within 15-30 minutes. The warmed water is then drained by attaching the tube and the water is emptied into the cooler knee for a couple of minutes. The cooler is then reattached and elevated and cold water flows back into the knee. The cuff should be emptied and refilled every hour while awake
- Prepare cooler: Connect the blue tube to the cooler. Add cold water to the line inside the cooler, then add ice to the top of the cooler. Allow 5 minutes with occasional shaking to chill the water.
- Apply the cuff: Always apply it empty. Secure the top strap, snug but not tight. Adjust the front opening so the cuff fits the slightly bent knee. Secure the bottom strap loosely. Do not stretch the elastic.
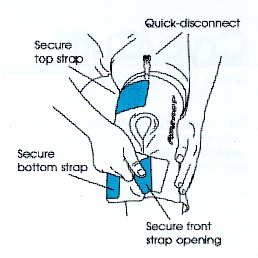
- Fill and pressurize: Connect the tube to the cuff. Open the air vent on the cooler. Elevate the cooler and hold for about 30 seconds to pressurize the cuff. The cooler can now be disconnected by pressing the metal tab on the quick – disconnect while the cooler is elevated to seal the pressure.
- Rechill: Rechill the water once an hour or as needed. Connect the tube , lower the cooler and the warmed water will drain from the cuff into the cooler. Allow a couple of minutes for the water to mix with the ice and rechill, then elevate the cooler and repeat the filling process. (Step 3)